Graphical Calculation View Nodes – JOIN
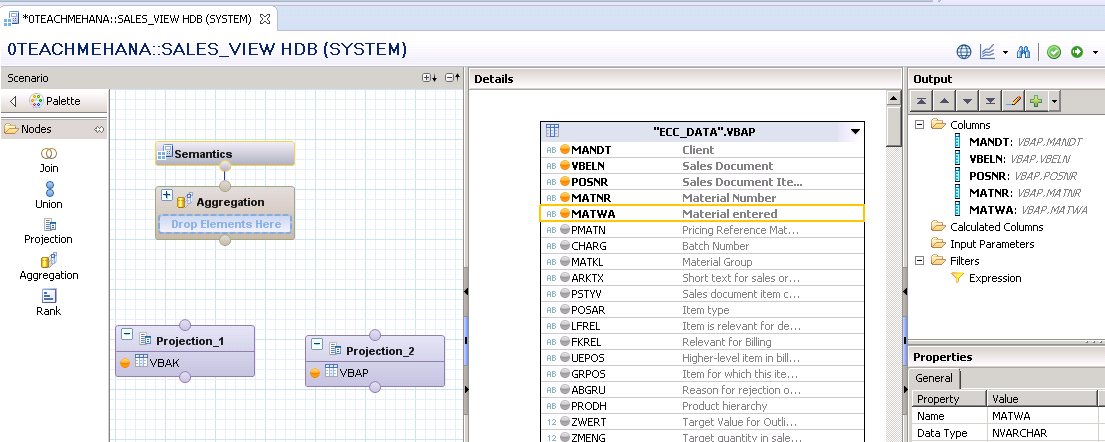
Continuing the build of our first graphical calculation view, we repeat the same process for VBAP to be added to Projection 2. Also, some of the fields we need from this table are also selected.
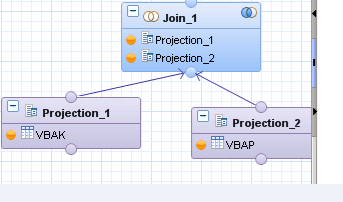
At this point, these are two individual tables floating in space with no interaction or relation whatsoever. Let’s change that. Bring in a Join block by dragging it into the space from the left menu as shown below.

Now you have a floating JOIN block. You need to tell it what it needs to join. As explained earlier, we want to do a left outer join between VBAK and VBAP. See those little circles on top of the projection nodes, the bottom circle is an input connector and the top circle is an output connector. Drag and drop the Output connector from projection 1 into the input node of Join 1 as shown below. Do the same thing for Projection 2. This means that you have taken the output of those projections and are using them as an input to the join block. The input connector that is dropped first into the join becomes the left part of the join and the second one becomes the right. The join connector only takes two inputs. So if we had a third table to join, you would need another Join block.

The join block now houses the two projections.
Click on the Join 1 node to open up the join mappings on the right hand side as seen below. Here, again select the fields that you want to send to the next level and as you see, the ones I selected are orange. Actually I selected all but the ones that are grey are the not selected because they are duplicate, i.e they exist in both tables so we only need it only once. Drag and drop the fields from one table to the other based on which you wish to join the two tables. This creates a linking line between the two as shown below. In this case, we join using the MANDT (Client) and VBELN (Sales Document Number) as the join conditions. Also, our requirement was to do a left outer join and all join nodes provide inner join by default. To change this, in “Join Type”, click on where the value is marked as ‘Inner’ as pointed by the green arrow below.

In this Join Type section, this opens up the drop down where you can select Left Outer Join.

Now the join is complete. As we did earlier, connect the output connector of the Join block to the input connector of the Aggregation block. After this is done, click on the aggregation block to bring up the selected field list as shown below.

Select the fields you require to move to the output.

1
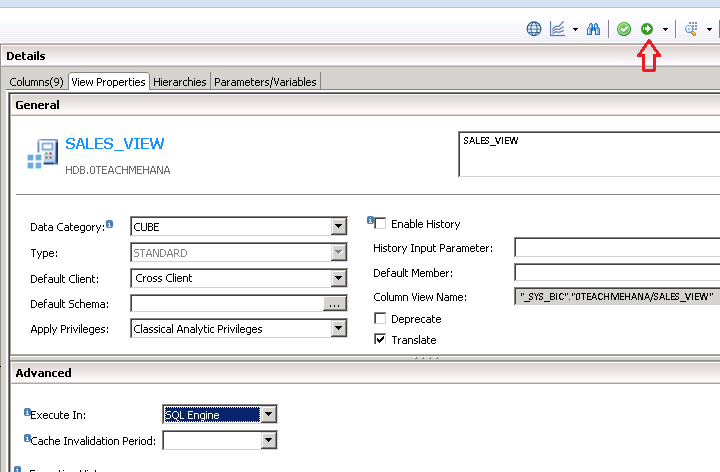
Once done, click on the Semantics block. This is where you maintain the overall settings of this graphical calculation view. Go to the “View Properties” tab. Data Category is CUBE as we selected in the beginning. You can change it here even at this point. If you are working with tables of SAP source systems, they most probably will have the MANDT field as I explained earlier. These tables are cross client and in those cases, change the Default client setting to “Cross Client” instead of “Session Client” as shown by the green arrow below. Also on the Execute In drop down, select “SQL Engine” for best performance.

Press the activate button shown below when done.
If the job executes with no red signs, your graphical calculation view was successfully built. If you don’t see your log anywhere, press the button I have marked by the red arrow below to bring it up.

Press the data preview button marked below to see if our view brings up any data.

Move to the raw data tab pointed by the red arrow. You would see the data preview of the first 200 records of this successful join. If you wish to display more, change the max rows setting pointed by the blue arrow and press execute to refresh the data again.
Also, you would see your first view inside your package as well. Well done! Pat yourself on the back. You are well on your way to be the HANA expert this world so desperately desires.

In the next tutorials, we will try out further features of the graphical calculation view. Help this website grow by sharing this document on social media by using the icons below. Be sure to subscribe to our newsletter when the message pops up for latest alerts on new tutorials.
Happy learning!

Hi
Its good article
Can you please tll me why should we have to execute in cross client
Client-The client is a logical partition ID of the database. Just like your laptop hard disk can be partitioned into multiple drive IDs like C:, D:and so on, there can be multiple SAP applications installed on different partitions of the same database. Thus, it’s important to tell the system, which partition the BW application you are trying to connect to exists upon.
Most tables used in SAP source systems have the field MANDT (Which provides the client number). The same table can exist in different clients with different sets of data.
When we join 2 different tables, it’s important that the tables also join based on their corresponding client numbers along with the other key fields. That is why you will notice that in almost all SAP joins, the field MANDT would always be involved as the first joining condition.
Hi shyamuthaman,
Thanks for your reply
Hi Shyam,
This explains why MANDT field is required to be selected from SAP tables while definiing views but why do I need to select “Cross Client” – why cant I keep it as “Session Client”
Thanks.
When a user runs a query on a view with session client, a filter gets applied to the data. The client value for the session that the user has configured on him/her gets applied as filter. As a developer, you would want to ideally see all the data that is present and tackle the authorizations as a separate design topic. That’s why we select cross Client
https://help.sap.com/viewer/fc5ace7a367c434190a8047881f92ed8/2.0.00/en-US/edcfd4e8bd9d41608830d13b437755c9.html
But where how system recognizes which drive its in D or C disks in the crtoss client do we have to assign patha?
Thanks in advance
Supb explanation ,Thanks’s for sharing
Thanks! Please share a tutorial on social media to support us.
Hi guys,
You can check out why we use cross client or session client below
https://help.sap.com/viewer/fc5ace7a367c434190a8047881f92ed8/2.0.00/en-US/edcfd4e8bd9d41608830d13b437755c9.html