Data Elements and Datatypes in SAP ABAP
Hello and welcome to the next tutorial on SAP BI ABAP. Today we will be discussing about data types and data element concept in SAP ABAP. A data type defines the type of value a field will hold. For example a Name field will hold character values and hence will be a CHAR type in SAP ABAP with let’s say a maximum length of 30. Similarly, different types of data have different data types. A list and explanation of all ABAP datatypes is explained in this SAP Page.
It is an elaborate list but we only need to use a few in most cases so I expect you to give that link a quick skim but don’t waste your time memorizing them. You will pick them up organically as we progress through this training and with practice of course.
Now what are data elements?
Sometimes when we are creating ABAP objects, we might need to use the same fields again and again in them. Let’s say your client asks you to create 10 tables and while analyzing the requirement, you realize that all of them contain a field called “Recurring Customer First Name “which should be of maximum length 20.
What would be a regular approach?
Let’s outline the steps.
1. Create table 1 with one of the fields as “Recurring Customer First Name “ and data type as CHAR length 20.
2. Repeat 9 more timees for the other 9 tables.
The data element can be understood as a custom data type that you can create. For example you create a data element for “Recurring Customer First Name “ with length 20 and then use this data element instead of the data type.
Advantages:
1. Less development time as re-usability is high. Using the data element brings in the description automatically as well as the data type and length.
2. Uniformity is maintained. If the field type has to be changed, it can be centrally changed from the data element instead of manually changing data types in each tables.
Let’s Create a Data Element
To Create a new data element, after logging into the SAP system, go to TCODE SE11.
You should reach the screen below.
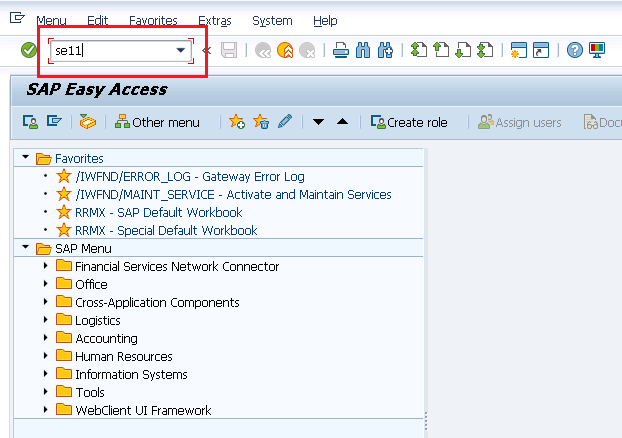
Every custom development that we do in SAP should ideally start with a ‘Y’ or a ‘Z’. In our case, for the field “Recurring Customer First Name “ , let’s give it a technical name as ZREC_FNAME. Enter this as shown and press “Create”.

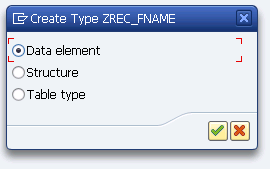
The below pop-up with be shown. Choose data element and press the tick button
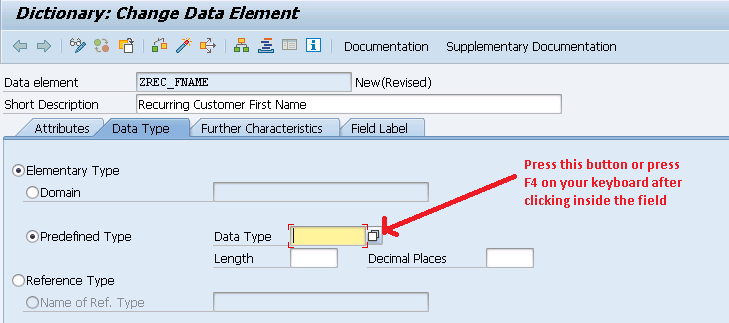
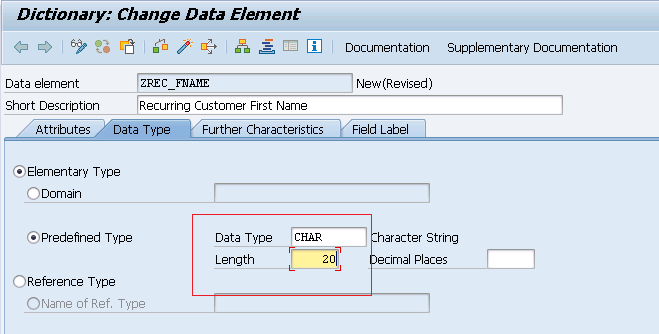
Enter a description for this data element that you are creating . which in our case is “Recurring Customer First Name “ and then choose the radio button for “Predefined Type” shown below.

If you already know the datatype you wish to use, you can type it in or else, just press the button shown below.Alternatively, use the F4 button on your keyboard to bring up all the possible values for this field.
This new window shows the list of all data types. The name should be a character string and hence CHAR should be selected.
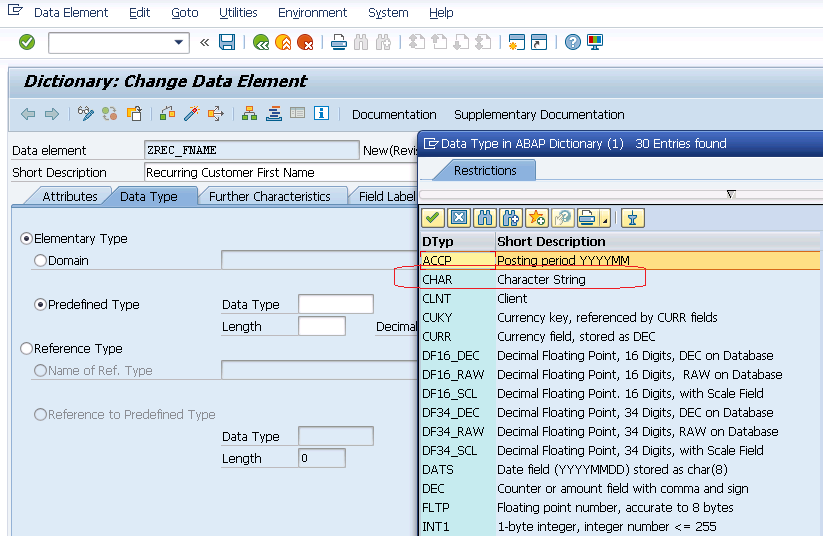
Also, type in the Length as shown below.
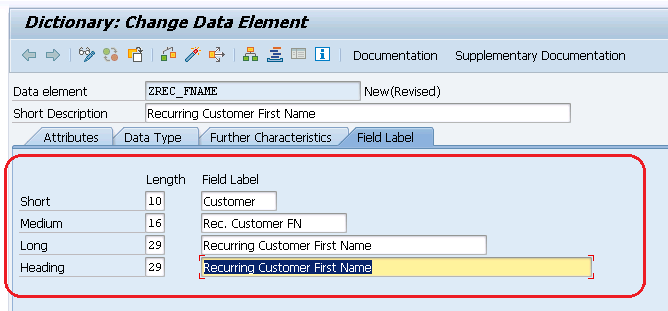
Now, we maintain the field labels by switching to the Field Label tab. Fill in one or more of these labels as shown below.
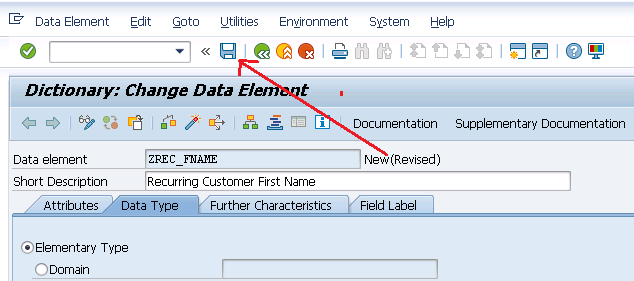
Now we do the standard Save![]() , Check
, Check![]() and Activate
and Activate![]() steps in SAP.
steps in SAP.
Let’s start with the save
The below Pop-up asks for a Package name. Now a package is kind of a folder that groups your developments. There is a standard package called $TMP wherein you can save your developments for now. You can either write $TMP or press the Local Object button. Both mean the same thing. The problem with this approach is that anything that is in $TMP cannot be transported from development to Quality Test system or Productive systems. So, if you are creating something for a client, you would ideally be saving this to an actual custom package like ZBW or whatever your project is using – just check with them. You can always save everything to $TMP and then change it to a custom package but it does waste some time to do that and is an irritating task nonetheless.
For the purpose of this tutorial, I will be saving everything to local package for now but when we do a tutorial about transports, we will move on to custom packages.
The below message at the bottom left of the screen confirms the save:
![]()
Now we click the check button to check for errors.
The below message again on the bottom left corner of the screen confirms the consistency of this object.
![]()
Now, for any object to be usable in SAP, it needs to be activated so we press the activate button shown below. I usually skip the Save and check steps and go directly for the activate since that includes the save, check and activate functions but it take more time to do all 3 together. So if you are sure that your development most probably has no errors, you can directly try activating things. I will be doing so from this point onward in the tutorial.
The below message confirms successful activation.
![]()
At this point, this data element is ready to be used in further developments. In the next tutorial, we will learn how to use these data elements in database tables. Please share this document across social media using the share buttons below and to people who are looking for learning BI ABAP. Also, don’t forget to subscribe to our newsletter to be alerted on new tutorials.
Until next time. Happy learning.
