BW Perspective in the HANA Studio
Welcome, all to the next BW4/HANA tutorial. In this one, we finally get to the tool used to develop BW4/HANA artifacts. Here, we use the SAP HANA Studio in BW Perspective. This is the same tool we use to develop native HANA information views like Calculation views. It would be good if you pre-read the SAP HANA Studio overview tutorial before proceeding further on this one. It would help you navigate this tool with further ease.
Another pre-requisite to using the BW Perspective is having the BW system set up in the SAP GUI as well. If you are unaware of how to do that read our SAP GUI tutorial before proceeding.
To start, open the SAP HANA Studio on your system. It doesn’t matter if the screen looks different from what you see below.

The SAP HANA Studio consists of different “Perspectives”. Each perspective serves its own purpose. The BW Perspective allows you to use the SAP HANA Studio instead of SAP GUI for development (although a lot of the operations call the GUI screens within itself..but let’s not get lost in that..more on that later).
Navigate as shown below

Select the BW modeling to choose the BW perspective

This opens up the BW perspective which in turn should also provide the tabs you see below.
The first one time activity here is to create a workspace which is basically a temporary workspace saved on your PC where your draft work is saved.

Right-click anywhere in the blank area and navigate as below to create a new project

Since we are in the BW4HANA section of this tutorial, I assume all of you want to learn BW .. so we make the obvious choice to create a BW Project.

Remember when I said at the beginning of this tutorial.. that SAP GUI setup was a pre-requisite to using the BW Perspective? I wasn’t joking around.. Since I did set up the connections on SAP GUI, all the systems available there are reflected here below. Select the BW4HANA system you wish to connect to. In this example, we’ll connect to B4H.

Press Next.

Press Next again to reach the below screen. Here, you must enter the client number, Username, and password given to you by your project ..or trainer.

Once entered press Finish.

You get the fancy processing logs..and eventually, it logs on..

Give the project a name.. or if you are as lazy as I am, leave it as it is .. Anyways, we weren’t coming up with a better name than that.

![]()
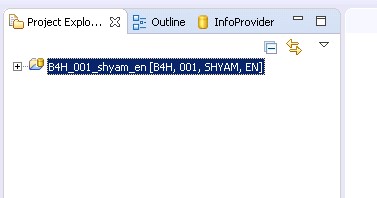
Once you press finish.. there’s no going back. You have now connected to BW4HANA and have chosen to enter the fun (sarcasm intended) life of a BW developer. I couldn’t have been any more happy for you..
We close this tutorial on this pseudo-sentimental note. Read on to the next one to learn more..

Thank you for very good explanation
This piece is a real gem! Lot’s big fun reading..???
Thanks man.. more coming this week on BW4HANA
Hello Shyamuthaman,
Anything new has been added for BW4HANA?
Nice Explanation
I always like to read your tutorials. Detailed explanation given on eavh and every topic. Your drafting is easily understandable.
Good One!
Any Plans on the next versions. Like , how we will be developing the objects in BW/4 hana. With some examples.
Data Flows.
Is there another tutorial after this one? Very helpful up to this point.
Hi Shyam,
Please plan to post more on this BW/4HANA. I am eagerly waiting for your material. So interesting and can understand easily. Excellent and amazing and at the end of the day reading is fun too!!!
Amazing stuff. Waiting for the next one
could you please elaborate on the roles for enabling the BW/4 HANA modelling system.
Hi Shyam,
Waiting for next tutorial on BW4HANA from long time :)).
Regards,
Ubaidullah
Hi Shyam,
Thanks for knowledge transfer.
may we know when we will expect next one.
Regards,
Pavitra
Thank you so much for the detailed info..when can we expect the next one ?