

Insert data into custom tables – Flat file loads to SAP HANA
Welcome to the next tutorial on SAP HANA. In this tutorial, we again start a three part series where we understand the different ways of loading data into tables created in SAP HANA. In our previous tutorials, we created a custom table using three methods – Graphically, SQL script and HDB Table method. I refer to them as custom tables here as they were created in HANA and not brought in to HANA from any external database. Now that we have these tables, we have a greater question at hand – How do we load data to it? This tutorial explains how to load a flat file into SAP HANA without any coding whatsoever.
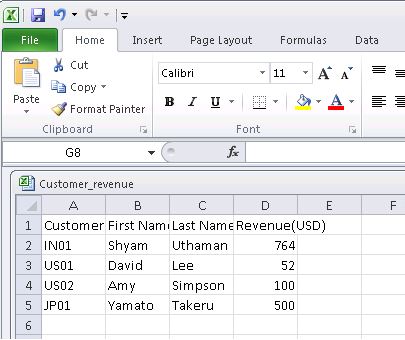
Let’s create our flat file first – A CSV file
First step would be to create a flat file – A comma separated value file (CSV).
Easiest way to do this is with MS Excel as we enter some data as shown below.

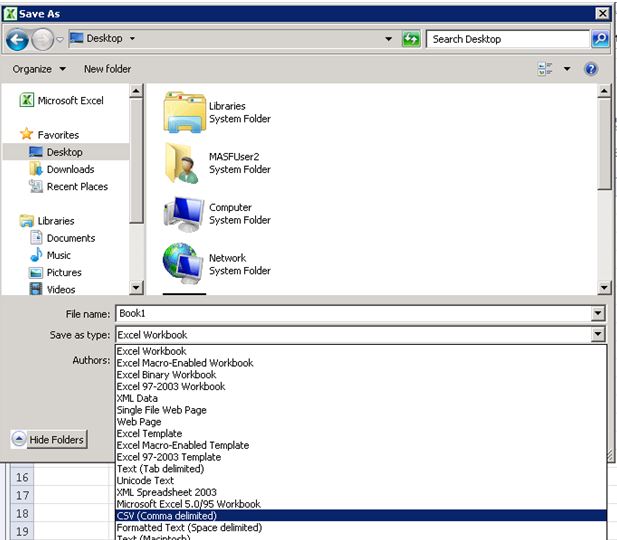
We proceed and save this file and make sure to choose the file type as CSV(Comma Delimited)

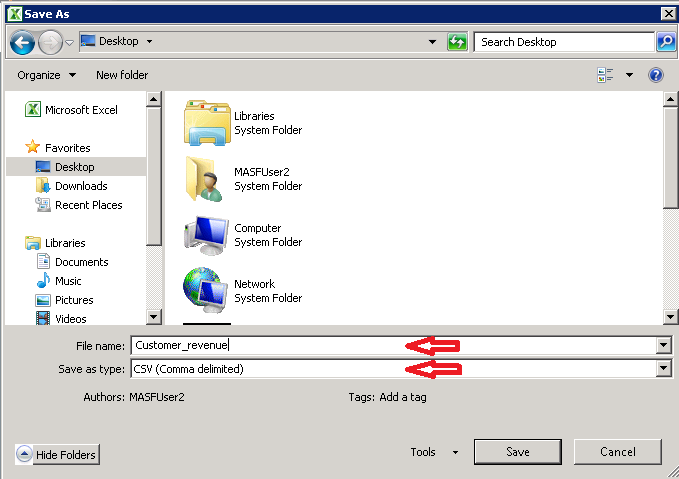
AS seen below, I have given it a file name and a file type

You would get the below message. Press Ok.


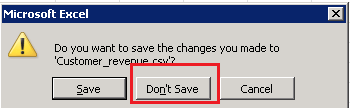
Then the below pops up. Press Yes.


Exit MS Excel. When trying to do so, a pop-up will ask you if you want to save this file. Press “Don’t Save” in this case. Trust me – Your file is already saved. If you save at this point, excel sometimes corrupts the CSV format.

Now after you are done with this, let me explain why this file type is called CSV or Comma separated value.
Checking the CSV file delimiter
To understand this, go to your file and open it in notepad. It is quite easy to accomplish. Right click on the file you created and then select “Open With” from the context menu.
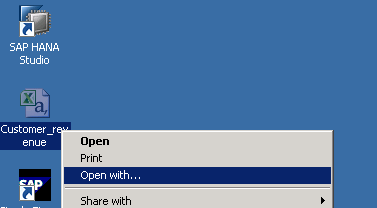

Choose program as Notepad and press Ok.


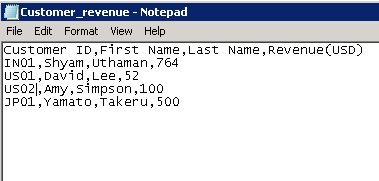
You would be able to see the file open in notepad now. As you see, each column of data is separated by commas and hence the name CSV is appropriate. Please always check the file in notepad as some of the newer versions of Excel save CSVs that are separated by semicolons (;) instead by default. It is not a problem, but you should be aware of what the separator is.

Now, make sure you close this file before proceeding further. Open files can cause errors in upload. Once closed, Open your HANA studio.
Uploading this CSV flat file to SAP HANA
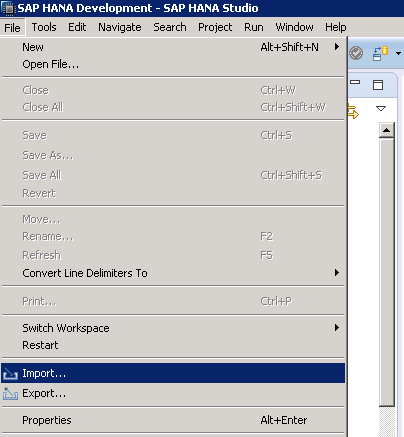
To start the flat file import, go to File -> Import as shown below.

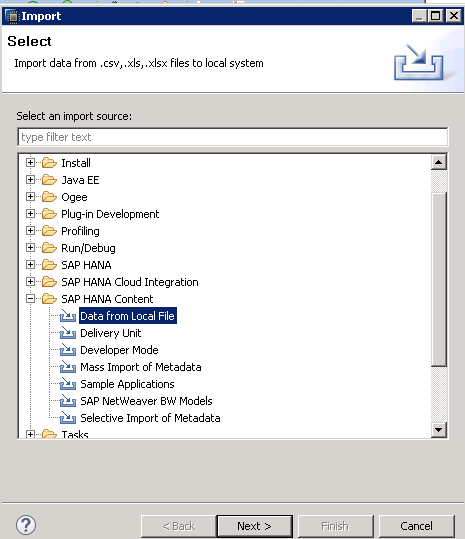
Select “Data from Local file” from the SAP HANA Content folder and click next.

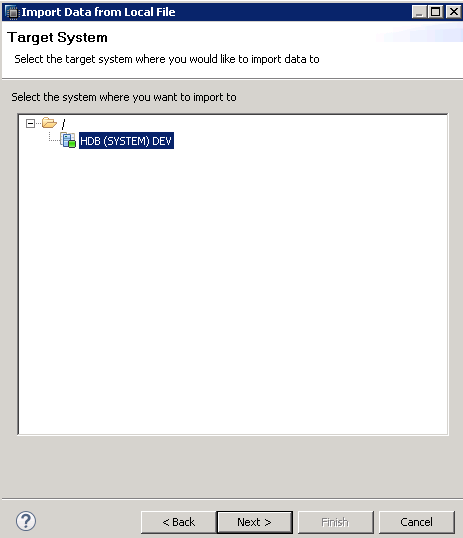
Select the target HANA system. In our case, the name is HDB but you might have multiple HANA systems added in your HANA studio and in that case, you would choose the system where you are importing this data to. Press next when the system has been selected.

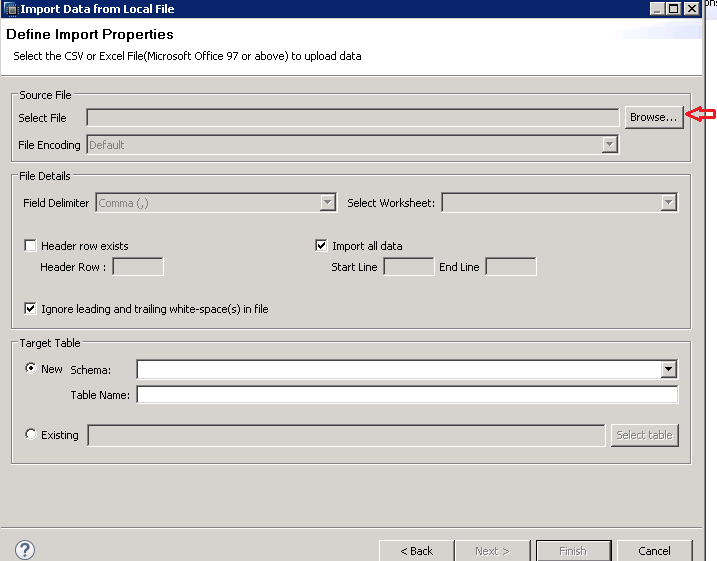
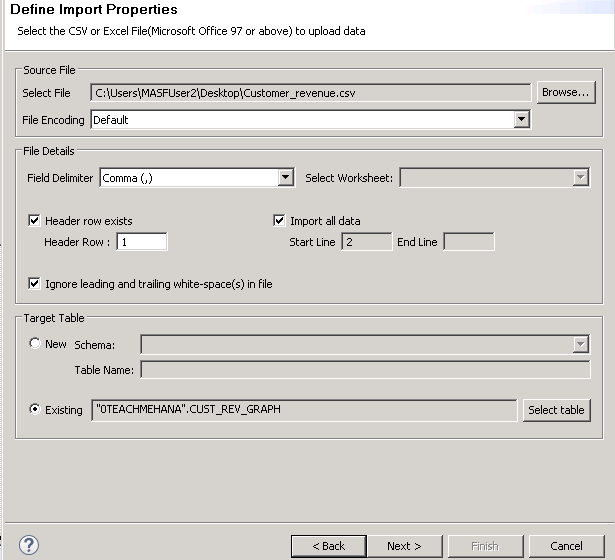
This will open up the below pop-up. Firstly, click on browse to select the file you wish to upload.

1
1
Once this is done, many new options become active. I have numbered them to be explain in a better way.
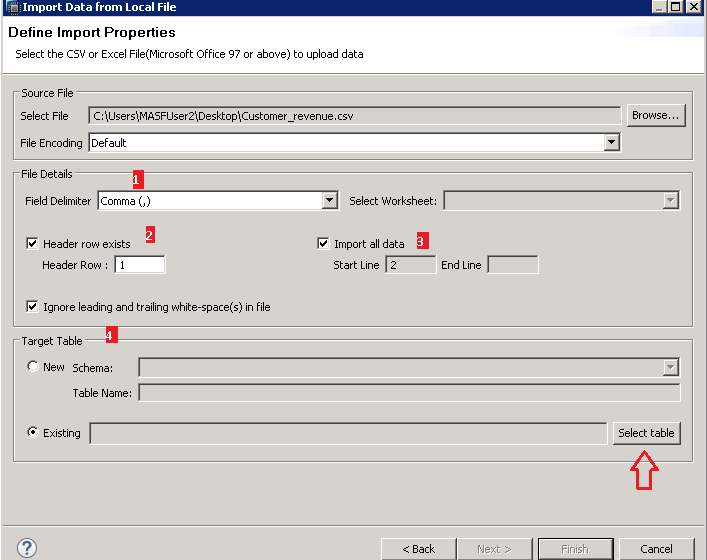
Mark 1 is the delimiter used in our CSV file. As we saw that in our case this was a comma but if it was something else like a semi colon for you, drop down and choose it.
Mark 2 needs to be checked if there is a header row in our data. Header rows are the rows containing names of the columns. These should not be considered as table data and to have them ignored, this check box needs to be checked.
Mark 3 needs to be checked if you want all the data from this file to be imported. If you only want partial data to be imported, uncheck this and provide the start line and end line numbers between which the data will be imported from.
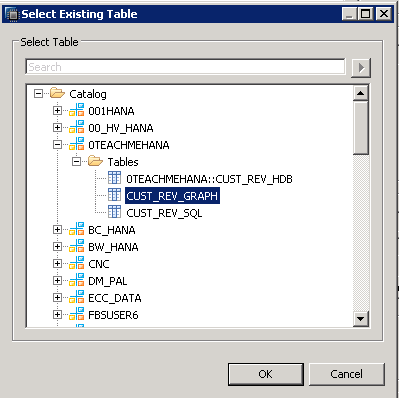
Mark 4 indicates the target table section. Here you tell HANA whether you want this data imported to a new table or an existing table. In our case, let’s import this data to our table created using the graphical method – CUST_REV_GRAPH. To do this, click on the select table button.

Find the table under your schema and press OK.

The overall settings should now look like the below. Press Next.

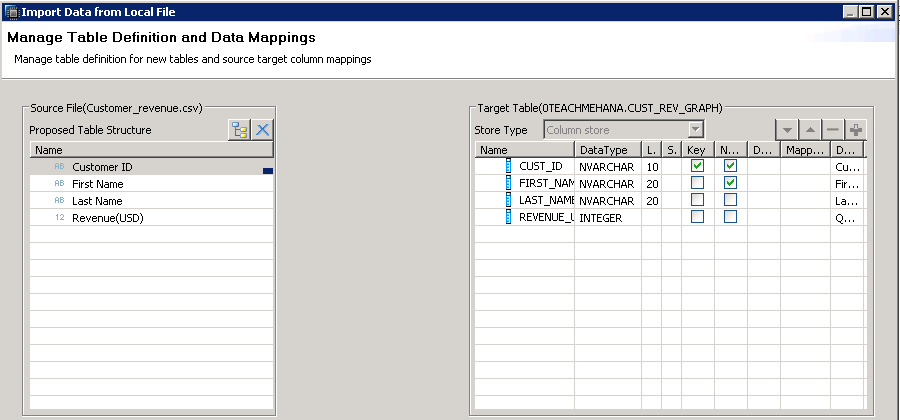
This takes you to the mapping window where you tell HANA as to what field from the CSV file goes where in the corresponding HANA table.

Drag and drop the source field to its corresponding target field to get the mappings as below.
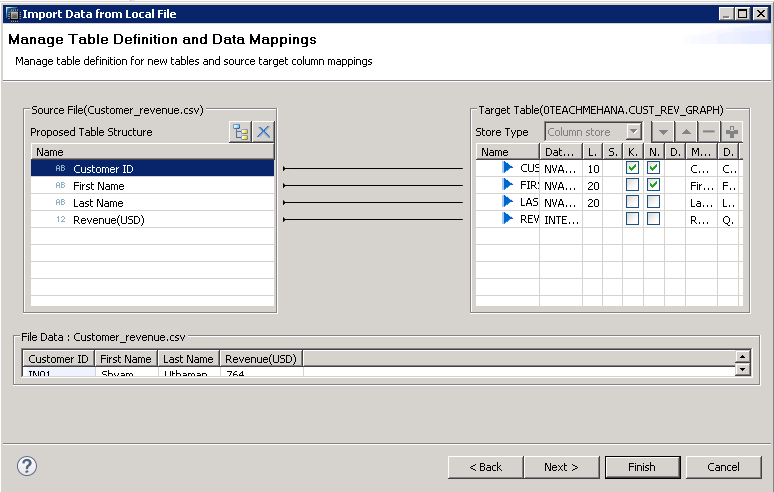

This screen below now shows the data preview of this import that we are trying to make. Just to be sure that you have not mapped the wrong source field to the target.


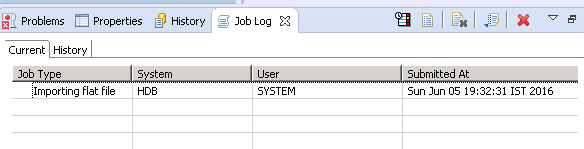
The log is not read and hence the import is successful and now this data should have loaded to the table.

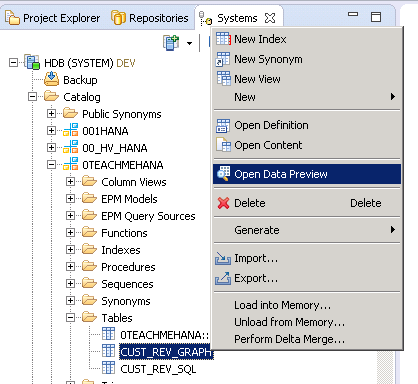
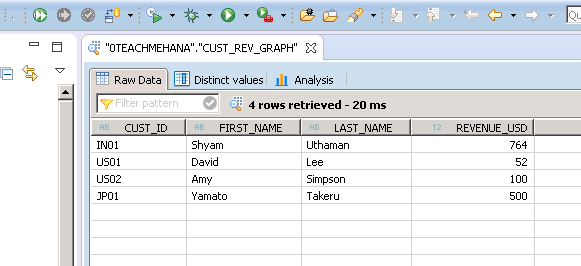
Right click on the table and click “Open Data preview” to check the data.

Below data confirms that we have correctly imported this table.

There are two other ways to fill in data to tables but since they include some coding, I will be posting them in the SQL section. These methods are:
- Adding data to a SAP HANA Table using HANA SQL script INSERT statement.
- Linking a CSV file to a HDBTable using HDBTI Configuration file (Recommended method)
This method and the SQL INSERT method are usually used for quick analysis but anything that you do for a client that involves customized tables should be done on HDB tables and with HDBTI config files explained in the above linked tutorial. Be sure to check them out too.
Help this website grow by sharing this document on social media by using the icons below.
Happy Learning!