SAP HANA Union node in Calculation view
Welcome back to the next in line tutorial on SAP HANA Union node in Calculation view. I hope you already read my tutorial on Unions SQL UNION and have a theoretical understanding of what a UNION is.
The funny fact about this UNION node here is that it’s doesn’t work like a UNION. It works as a UNION ALL operator. This means that keeps piling one data set below the next without aggregating them.
Let’s take an example to see how a UNION works. Since the last few tutorials, we have been working on the EMPLOYEE view which has the scores of a test that employees of the finance department of a company took on the first day of every month from Jan-16 to May-16.
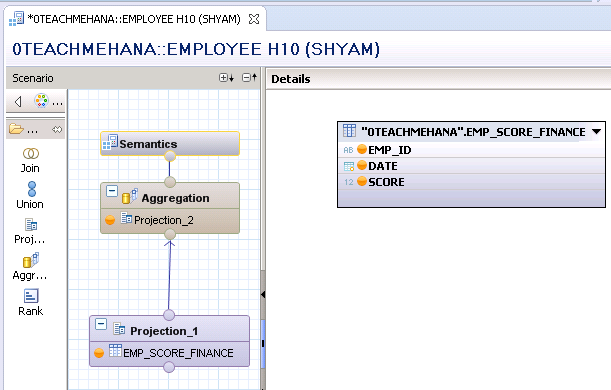
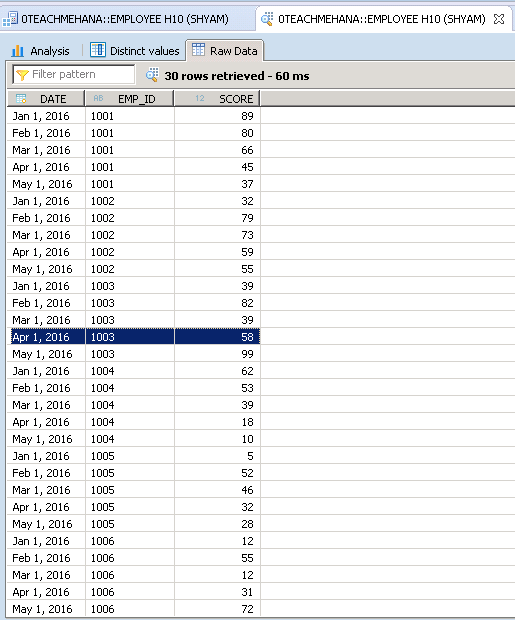
The below output is the data preview of the view when only this table is involved with no further logic.

1
Now, the company tells you – the developer, that this view should provide data for the same test done in the marketing department as well. This means that you would need to incorporate the table that would provide this data into this view.
Drag another Projection node out which would hold the new table.
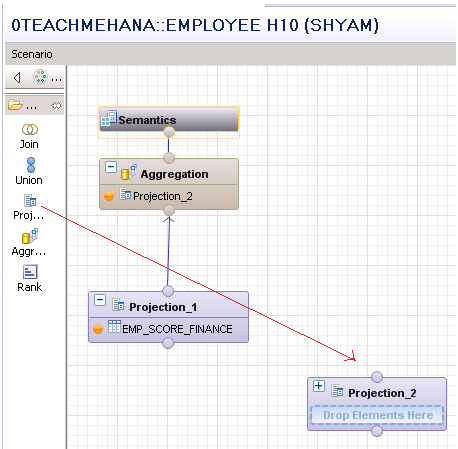
You can also drag tables into these projection nodes instead of right clicking the projection and searching for them by names. This is faster and at times much more emotionally satisfying.
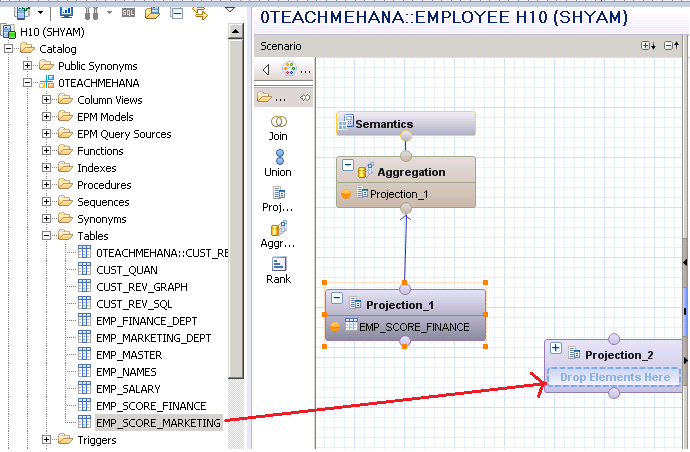
As seen below, the Marketing score table has been successfully added to Projection_2.
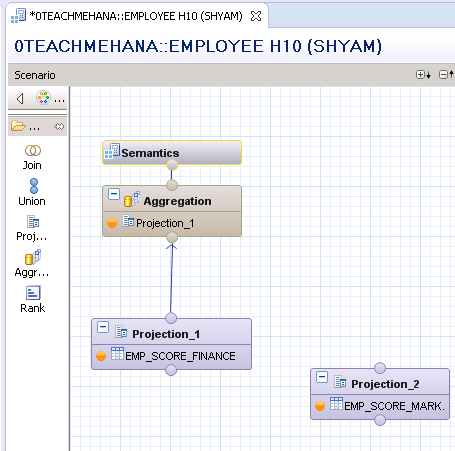
Now, you need to decide on what operator you should use so that the two data sets combine into one larger data set.
Would it be a JOIN or a UNION?
Answer – A Union block because:
- The tutorial is on UNIONs. Did you seriously expect the answer to be JOIN?
- A Join is usually done when based a field in one table, you need to fetch the related data from other tables. For example, based on employee ID in one table, address data for that employee can be fetched from some other table which has this information.
- UNIONs combine similar data sets. It just stacks data sets – one below the other.
To achieve this, drag the UNION node on to the arrow connecting Projection_1 and the aggregation. This would place the UNION node between these two.
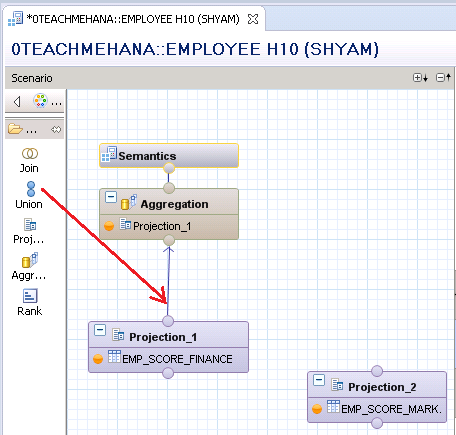
It asks for your confirmation before doing so. Press “Yes” to continue.

Connect the marketing data projection node to input of the union as well which is displayed below marked by the green arrow.
Click auto-arrange to clean the layout up. The button is marked by the red arrow below.
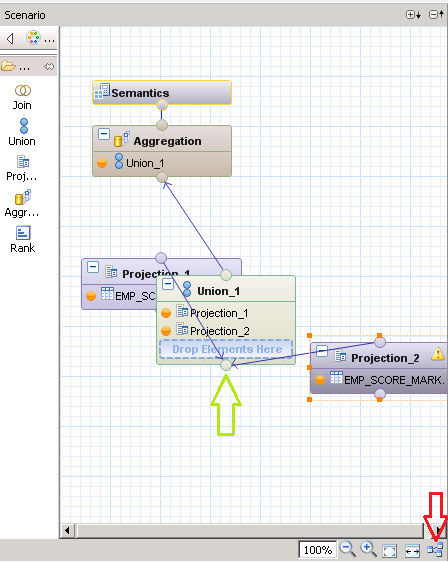
The layout gets sorted out as shown below, Now click on Projection_2 and select all the fields for output.
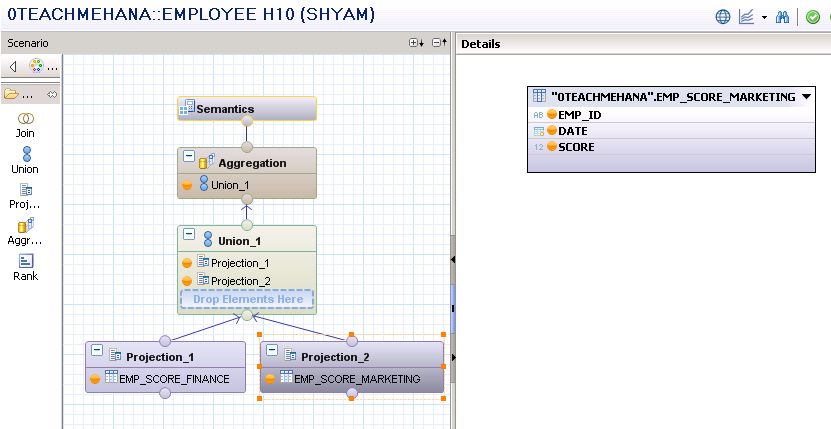
Click on the UNION node and you would realize that both the Projection nodes are displayed here on the source side and the target side contains the output structure of this node. Since we added this node between projection_1 and aggregation, all fields of this projection are auto-mapped to the output.
Expand the little blue plus buttons on each projection(Marked by the red arrows below) to get a better view of their fields.
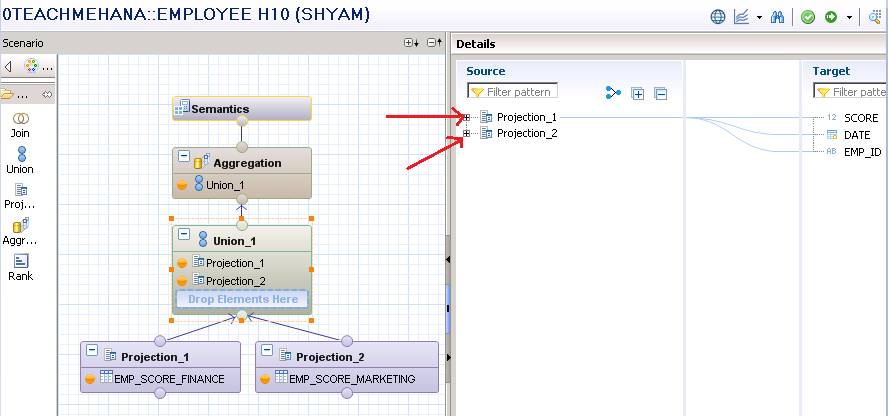
As explained earlier, all fields of projection_1 are mapped to output. The source fields of Projection_2 now need to be mapped to their corresponding targets.

Drag and drop the EMP_ID field from the source to the corresponding target.

Similarly, map the DATE and SCORE fields. Your completed mappings would look as shown below.
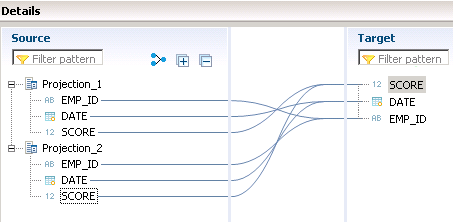
When done, activate this view.
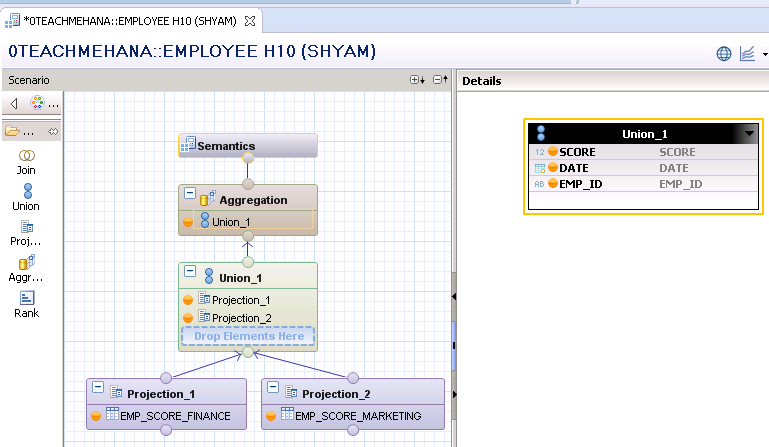
The below data preview confirms that the two data sets have now converged into a larger data set. Thus our objective was achieved.
Thank you for reading this tutorial.
Share, Subscribe and comment below to keep this website active.
Happy learning.
<<Previous Tutorial Next Tutorial>>

Hi shyamuthaman ,
All your tutorials are very good and explained in easy language.
I had a doubt in this tutorial. If there is a requirement to rank the union of the table then we will have to drag the rank node and drag and drop rank node in between union and aggregation node ? . Sorry I don’t have system to practice so I had this doubt after reading this tutorial.
Thanks & Regards,
Praveen
How to set an indicator for department if the data is coming from proj1 or proj 2
In the union node, create a new field with the green plus symbol on the right. Let’s call the field HANASOURCE. Now right click on HANASOURCE field and select “Manage Mappings”. There you can maintain constant values of Proj1 and Proj2. This creates a new field which will have value Proj1 if it comes from proj 1 and the proj2 for data coming from proj2
Hi,
Can we use union node if there are different number of columns in those 2 tables ?
Sir,Please explain other different scenario’s in graphical calculation view.Because it could be really helpful for SAP HANA beginners.